
Sharpen vs Unblur vs Upscale: What Does Your Photo Actually Need?
You zoom in on a photo and it falls apart. The eyes might be soft. There could be a faint ghost edge running along someone's shoulder, or the whole frame turns into little squares once it's shown bigger than a phone screen. Each of those needs a different fix.
Most photo apps lump sharpening, deblurring and upscaling together, sometimes under a single slider labelled "Enhance". Pick the wrong tool and you lose ten minutes. Get it badly wrong and the photo ends up worse than where you started, with halos around every edge and noise crawling across the sky.
Start with the symptom
Open the photo at 100% and look at the spot that ought to be sharpest, like an eye, a line of text or the edge of a building. Then find your row.
| What you see | Likely cause | What you need |
|---|---|---|
| Slightly soft, but every detail is there | Low edge contrast, mild lens softness | Sharpen |
| Edges smeared, doubled or streaked one way | Camera shake or a moving subject | Unblur |
| Everything hazy, nothing crisp anywhere | Missed focus | Unblur |
| Fine when small, blocky when enlarged | Too few pixels | Upscale |
| Small and blurry at once | Low resolution plus blur | Unblur, then upscale |
Sharpening only adds contrast to edges. Deblurring tries to move smeared detail back to where it came from, and upscaling hands the image more pixels, which is what you need once a photo is headed for print or a 27-inch monitor.
Sharpening
Your phone sharpened the last picture you took before the JPG was even written to storage, and almost every camera does the same. The algorithm hunts for places where brightness changes, such as an eyelash or a roofline against the sky, then darkens the dark side of that edge a little and lightens the light side, which your eye reads as crispness.
Unsharp Mask and High Pass, the two filters most people know from Photoshop, both work this way. They're fast and predictable, and they add zero new information to the image.
A gentle sharpen is the right call when a photo is in focus and just looks flat, which happens with RAW files and with images you've shrunk for a website. Printers like a touch of it too, since ink spreads slightly into paper.
Push the slider too far and halos show up: thin bright outlines around dark objects, dark ones around bright objects. Noise gets sharpened too, and skin turns to sandpaper. A motion-blurred edge is a smear three or four pixels wide, and more contrast only makes that smear easier to see.
Can blur be reversed?
In a blurred photo, light that belonged on one pixel has landed on its neighbours. Camera shake drags it into a line. With missed focus it spreads into a soft disc, and a dog sprinting across the frame leaves a trail. Deblurring (some apps call it unblurring) tries to reverse the spread.
The older method is deconvolution, where you estimate the shape of the blur and then run the math backwards. It copes with mild, even blur. Real photos rarely blur evenly, though, and deconvolution tends to leave ripples ringing around the edges. AI models are trained on pairs of sharp and deliberately blurred images instead, so they have a decent idea of what an eye, a strand of hair or a line of 10-point text should look like, and they redraw it.
Deblurring helps most with doubled edges from low-light shake. It also rescues shots where autofocus grabbed the wall behind your subject, and old scans that are soft all over.
Adding pixels with upscaling
A 1000 × 750 photo upscaled 2x becomes 2000 × 1500, and 4000 × 3000 at 4x. How it looks afterwards depends entirely on where those new pixels come from.
Ordinary resizing, the bicubic or bilinear option tucked inside every editor's Image Size dialog, fills the gaps by averaging neighbouring pixels. The detail just spreads thinner, and it looks soft. AI upscaling (super-resolution, in research papers) predicts the missing detail from what the model learned on real high-resolution photos. Fabric keeps its weave and small text stays readable.
Upscaling earns its keep once a photo that looked fine on your phone turns blocky on a laptop. Print shops and marketplaces that demand a specific pixel size are the other big reason, along with the times all you've got is a thumbnail or a tight crop. For print targets, the 300 DPI printing guide lists exact numbers.
A basic resizer keeps whatever blur the photo already had and simply enlarges it. A good AI enhancer tackles blur and resolution in one pass, though it still helps to know which of the two your photo suffers from, since that tells you what result to expect.
When a photo needs more than one fix
Lots of photos have both problems, like a shaky shot from a 2012 phone that's also only 960 pixels wide. For those, the order you fix things in makes a visible difference.
- Deblur first, at the original size, so the model works from real pixels rather than interpolated ones.
- Upscale second. Starting from clean edges, the extra pixels multiply good detail.
- Sharpen last, if at all. AI output comes out crisp, and a sharpen pass on top of it is the quickest route to halos.
HD Image Enhancer runs deblurring and super-resolution together. For most photos that means you can skip the manual sequence entirely and just pick a scene (General, Portrait, Object, Scenery, Pets or Text) so the model knows which kind of detail to protect.
One blurry photo, three fixes
To see how this plays out on a real file, we took a 1000 × 667 portrait with sideways motion blur and ran it through each approach. The blur is easy to spot at full size. Both eyes have a faint second outline, the stripes on her shirt run together, and the buildings behind her are smeared into horizontal streaks.
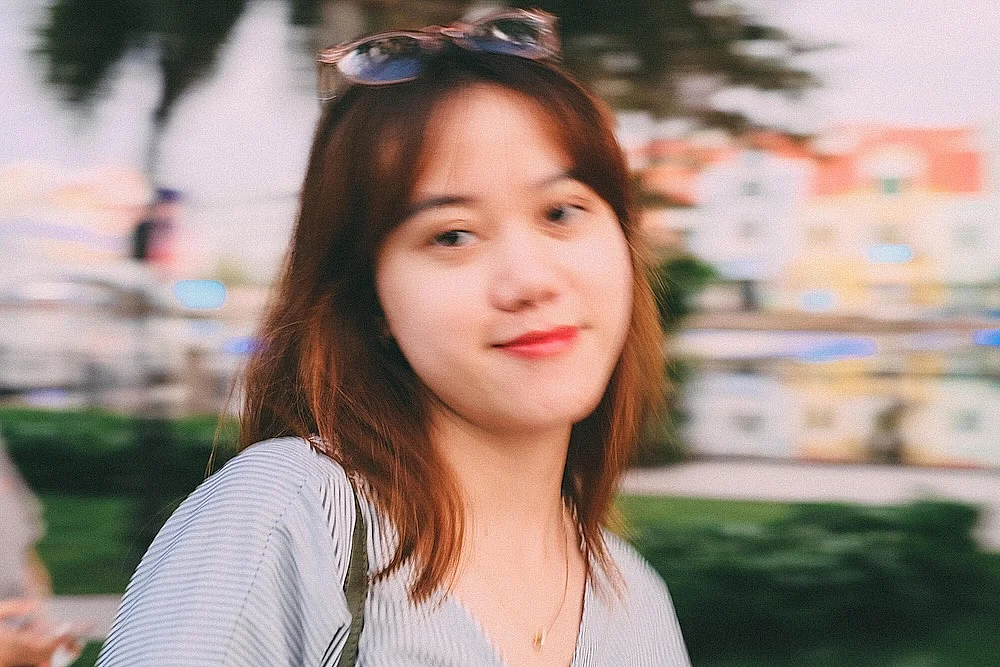
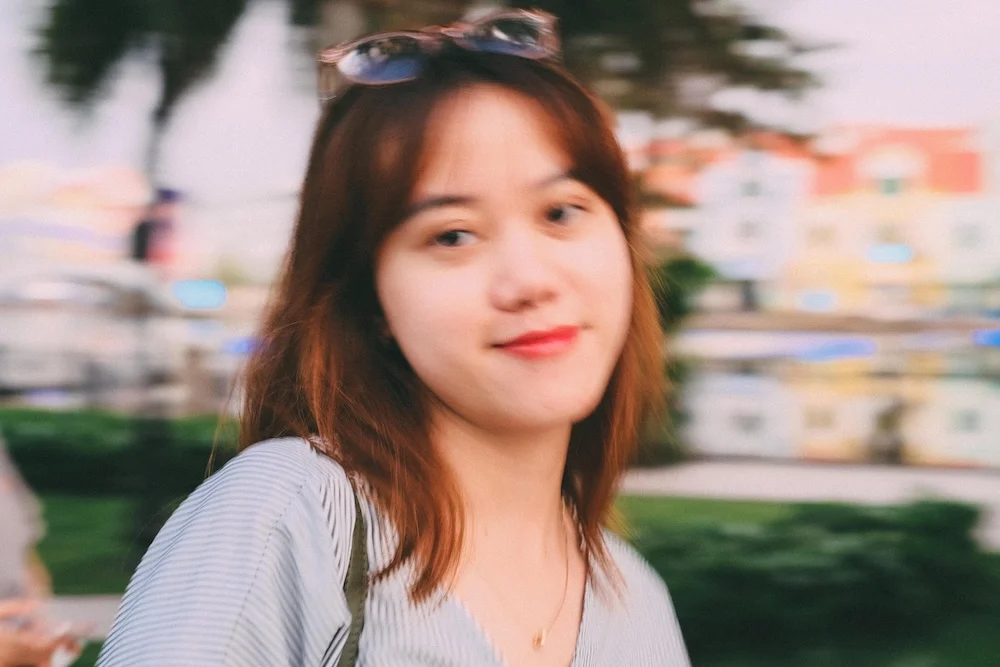
Sharpening made the photo look crunchier without making it any clearer. Bright and dark outlines appeared along the hair and the skin picked up a grainy texture. Look at the eyes. The double edge is still there, now with more contrast.
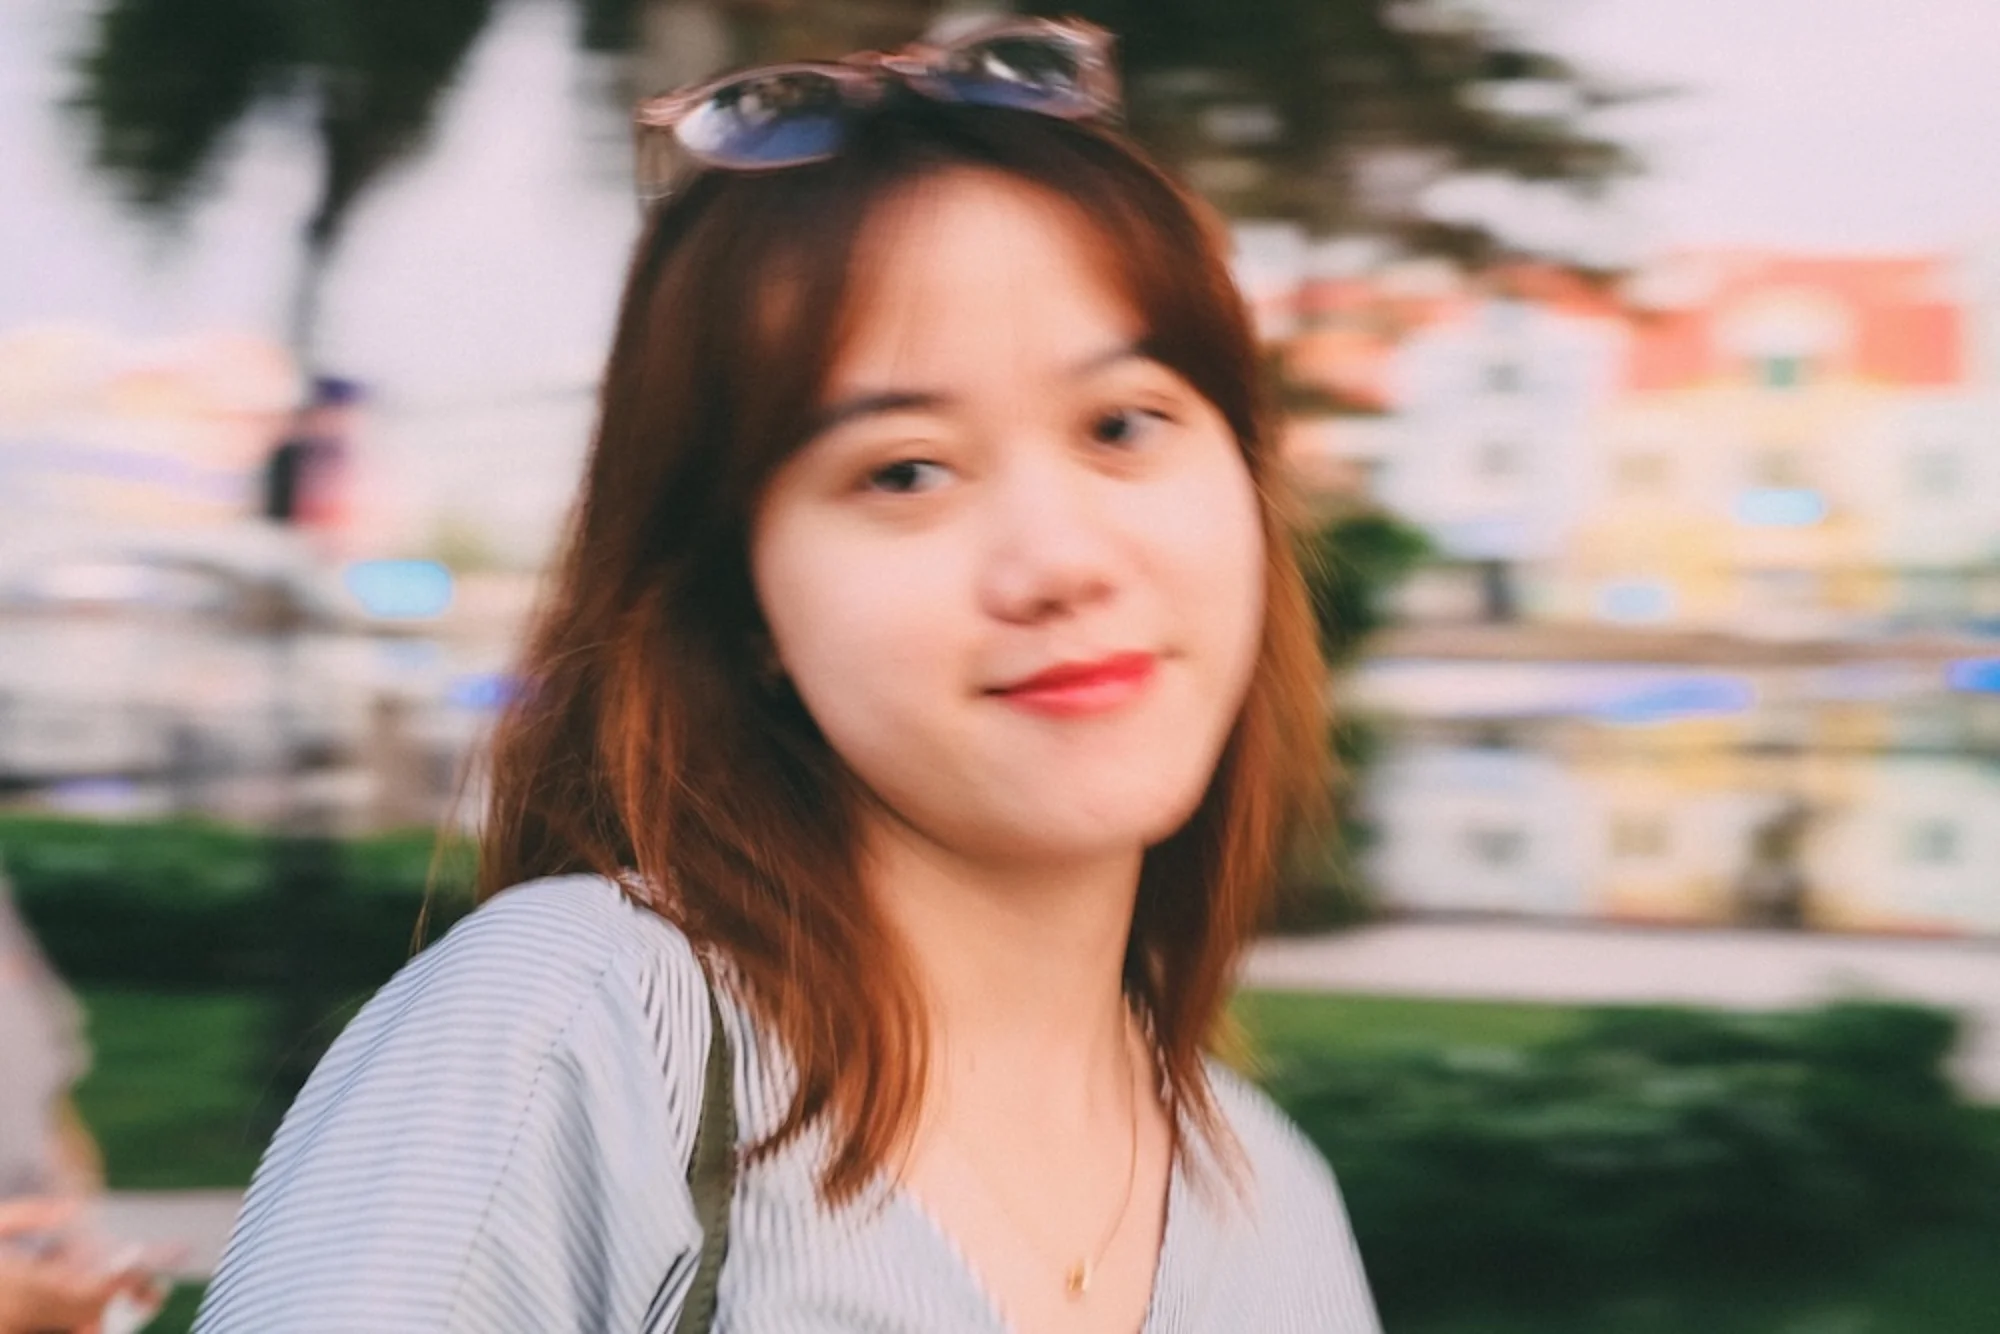
The bicubic version has four times as many pixels and no extra detail. Shown at the same width, the two are almost impossible to tell apart, and at 100% zoom the eyelashes are the same soft smudge, only larger.
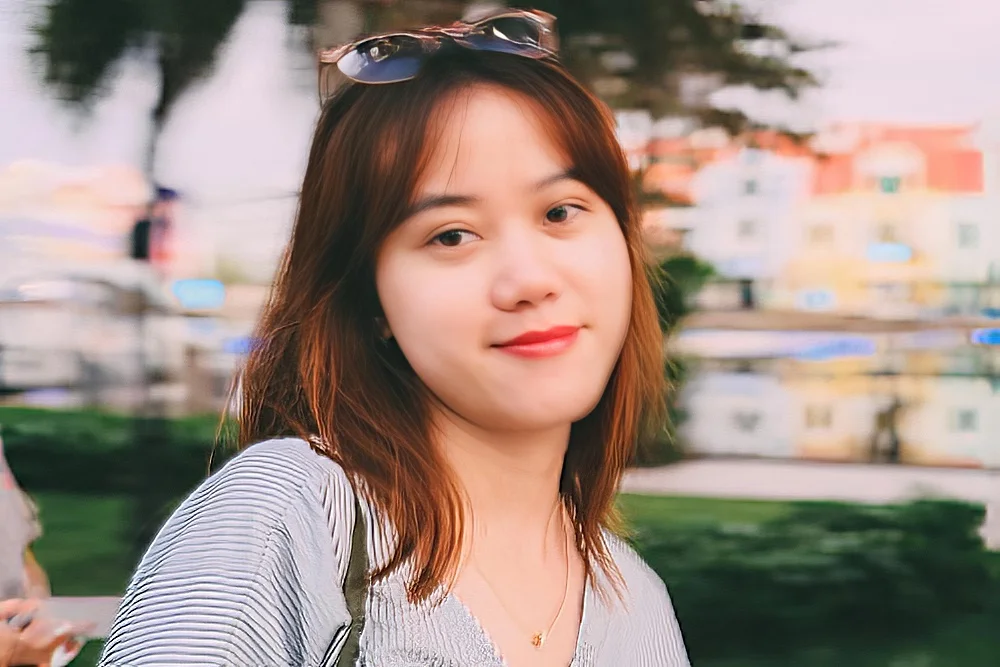
HD Image Enhancer was the only one of the three to remove the blur. Eyelashes and single strands of hair came back, the shirt stripes separate cleanly again and the lips have a defined edge. The background stayed soft, which suits a portrait anyway.
Where people go wrong
Sharpening a blurred photo tops the list, since the only thing it adds is halos. Close behind is upscaling through Photoshop's Image Size or a phone editor's resize tool, both of which interpolate, so the file grows while the picture stays exactly as soft as before.
Your camera already sharpened the JPG once, so every pass you stack on top compounds the artifacts, and it's easy to miss on screen until the print comes back crunchy. Tiny sources cause the rest of the disappointment. A 200 px thumbnail can come out far cleaner, yet it won't become a detailed 4K photo, because that detail was never captured. Keep the untouched original somewhere safe, so you can run it again with a different scene setting.